LiteSpeed Cache Settings is a powerful caching solution designed to enhance the performance of websites. It leverages advanced techniques to optimize loading times, improve user experience, and reduce server load. In this article, we will delve into the key settings of LiteSpeed Cache, how to configure them effectively, and common questions that arise among users.
What is LiteSpeed Cache?
LiteSpeed Cache is a caching plugin that works seamlessly with LiteSpeed web servers. Unlike traditional caching mechanisms, LiteSpeed Cache operates at the server level, which means it can provide faster performance improvements. This is particularly beneficial for WordPress sites, as it integrates with popular content management systems (CMS) to deliver optimized pages quickly.
The primary function of LiteSpeed Cache Settings is to store static versions of your dynamic content, reducing the need to repeatedly generate pages on the server. By serving cached content, you can significantly decrease load times, which is crucial for retaining visitors and improving SEO rankings.
In addition to basic caching, LiteSpeed Cache Settings includes various optimization features, such as image optimization, CSS and JavaScript minification, and database optimization. These features work together to enhance the overall performance of your website.
Key LiteSpeed Cache Settings
Configuring LiteSpeed Cache Settings properly is essential for maximizing your website’s performance. Here’s a breakdown of the key settings you should focus on:
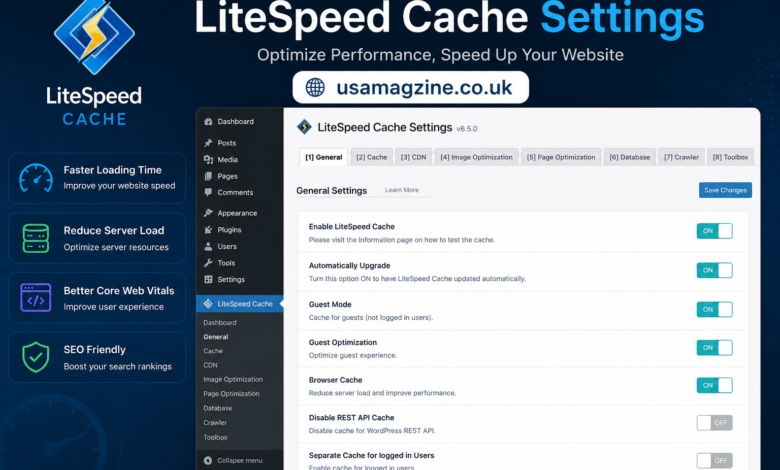
1. Cache Settings
The Cache Settings section is where you’ll find the core options for controlling how LiteSpeed Cache Settings operates. Here are the crucial components:
- Enable Cache: This is the primary toggle that activates or deactivates caching on your site. Make sure to enable it to start benefiting from faster load times.
- Cache Expiration: This setting determines how long a cached page is stored before it expires. A shorter expiration time means content updates will be reflected sooner, while a longer time can improve performance. Typically, a value between 1 to 24 hours is recommended, depending on how frequently your content changes.
- Cache for Logged-in Users: If your site has a membership or user login system, you can choose to cache pages for logged-in users. This setting can be beneficial for sites with frequent updates, as it allows users to see the latest content without delays.
2. Purge Settings
Purge settings control how and when cached content is cleared. Proper management of these settings is crucial to ensure that your visitors see the most current content. Here are the main options:
- Automatic Purge: You can set LiteSpeed Cache Settings to automatically purge cached pages when you update your posts or pages. This ensures that users always see the latest version of the content. Enabling this feature is highly recommended for most sites.
- Purge All on Update: This option will clear the entire cache whenever a significant update occurs on your site. While this can be useful, it may also lead to temporary performance dips as the cache rebuilds. Use this judiciously for sites that don’t update frequently.
- Purge by URL: This setting allows you to manually purge cached pages by specifying URLs. It’s particularly useful for targeted updates without clearing the entire cache. If you have specific pages that need immediate updates, this feature can save you time.
3. Optimization Settings
The Optimization Settings section is where you can fine-tune your website’s performance further. Here’s what you need to consider:
- Minify CSS and JavaScript: Enabling minification reduces the size of your CSS and JavaScript files by removing unnecessary characters. This can significantly decrease load times, especially on mobile devices. However, ensure that your site functions correctly after enabling this feature, as it may sometimes cause conflicts with other plugins.
- Lazy Load Images: This feature delays the loading of images until they are visible in the user’s viewport. By implementing lazy loading, you can improve page speed and reduce initial loading times, which is particularly beneficial for pages with many images.
- Combine CSS and JavaScript: Combining files reduces the number of HTTP requests made by the browser, which can speed up loading times. However, this setting can sometimes lead to issues with scripts not loading correctly, so it’s best to test your site thoroughly after enabling it.
Frequently Asked Questions (FAQ)
What is LiteSpeed Cache Settings and how does it work?
LiteSpeed Cache Settings is a server-level caching solution that stores static versions of dynamic content. It works by intercepting requests and serving cached files instead of generating pages from scratch, significantly improving load times.
How do I install LiteSpeed Cache?
To install LiteSpeed Cache Settings simply navigate to your WordPress dashboard, go to Plugins, and search for “LiteSpeed Cache.” Install and activate the plugin, and you’ll be guided through the initial setup process.
Can LiteSpeed Cache be used with other caching plugins?
While it is technically possible to use LiteSpeed Cache Settings alongside other caching plugins, it is not recommended. Conflicting caching mechanisms can lead to performance issues and unexpected behavior on your site. It’s best to use LiteSpeed Cache as your primary caching solution.
What should I do if my site breaks after enabling LiteSpeed Cache Settings?
If you experience issues after enabling LiteSpeed Cache Settings try disabling specific features like minification or combining CSS/JavaScript. You can also clear the cache to see if that resolves the problem. If issues persist, consider reaching out to LiteSpeed support for assistance.
Quick Facts Table
| Feature | Description |
| Caching Type | Server-level caching for fast performance |
| Automatic Purge | Clears cache on content updates |
| Minification | Reduces file sizes of CSS and JS |
| Lazy Load | Delays loading of images until in viewport |
| User Cache | Option to cache pages for logged-in users |
| Compatibility | Works best without other caching plugins |
Conclusion
In conclusion, understanding and configuring LiteSpeed Cache settings is essential for optimizing your website’s performance. By leveraging the powerful features of LiteSpeed Cache, you can significantly improve loading times, enhance user experience, and increase your site’s SEO rankings. With the right settings in place, your website will not only perform better but also keep your visitors engaged and satisfied. Whether you’re running a blog or an e-commerce site, investing time in these settings will pay off in the long run.